This page has moved and will no longer be updated. To access the current page, click the Online Help  icon in PrismHR or navigate to the new help docs site and search for your topic.
Performing Status Type Changes
Use the Status Type Change form to change:
|
•
|
Employment status to one of the same class, such as Active PT to Active FT |
|
•
|
Employment type, such as seasonal to part-time |
Note: To perform a status change for multiple employees at once, see Processing Mass Employee Changes.
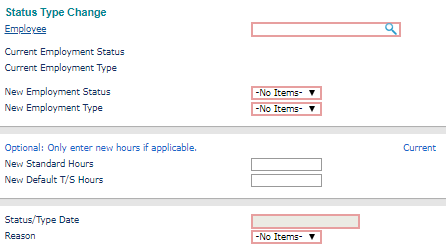
To change an employee status, do the following:
|
1.
|
Enter or select the Employee ID. The employee's name, current employment status and type display. |
Note: A warning message displays when there is an existing future dated pay history record for the same effective date and an entry exists in the New Standard Hours field, "A Pay Rate Change has already been entered with that effective date. If you continue, that change will be discarded. Do you wish to continue?" If you select Yes, the system saves the record and clears the form. (Selecting No returns you to the form where the entries still display.)
|
2.
|
Select the New Employment Status. This must be a status of the same class as the current status: either active, leave, or terminated. If you need to change the status from an on leave status to an active status, for example, you need to use the Reactivation feature. |
Note: When you perform a status type change for an employee who has an on leave status classification or a terminated status classification, the following items do not update:
|
•
|
Auto enrollment of benefits |
|
•
|
Auto enrollment of retirement |
|
•
|
Standard hours or default time sheet hours updates |
|
3.
|
Select the New Employment Type associated with an updated employment status. |
|
4.
|
Enter the New Standard Hours associated with an updated employment status. The Current column displays the employee's current Standard Hours and Default T/S Hours (if any). |
|
5.
|
Enter the New Default T/S Hours associated with an updated employment status. |
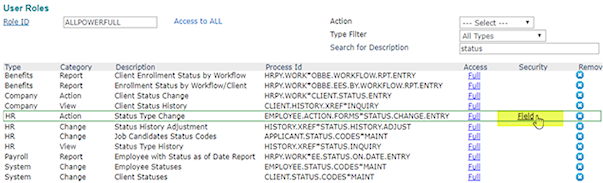
Note: The New Standard Hours and New Default T/S Hours field values are not required, so only enter these hours if they are applicable. Also, to hide these fields so Worksite Managers and Worksite Trusted Advisors cannot access them (recommended method), set the field security to Hidden for the form. (Setting the field security to Disable disables the fields.)
|
6.
|
Enter the Status/Type Date when the status change goes into effect. |
|
7.
|
Select the Reason that best describes this change. |
Note: If the status will terminate the employee, and the employee ID is associated with a user account, then the user loses access to the client. If the user needs temporary access to the client information, the user administrator needs to adjust the Data Security. See Granting User Access to Former Clients and Employees.
Actions Menu
You can access related features by selecting them from the Actions menu.
Related Topics
Tracking Employee Leaves of Absence
Reactivating an Employee
Terminating an Employee
Rehiring a Terminated Employee
